This is something I’ve been wanting to do a while. As you recall, I’ve been reinstalling everything in my VMware vSphere 5 home lab I’ve decided that I really need/want/”glutton for punishment” to install SQL Server 2008 R2 and start moving away from the default SQL Express stuff that most of the VMware tools let you get away with. That doesn’t mean I did it for everything,  but I wanted to start working on VMware View 5 and thought it might be a great idea to use it as my first reason to install SQL. Shoot me now 🙂 The great news is I learned a ton, and that’s all that matters in my book. Hopefully you will as well.
This install doesn’t get any easier than really doing “next, next next next” and just taking the defaults. If you do that, it keeps things easier down the road. Now, that doesn’t mean it stays easy because I already know what’s going to happen in 3 blogs and I get to fix some of my “next next next” stuff but so will you. Any, why ruin a good opportunity to teach right ?!?
First things first, deploy a Windows 2008 R2 Server from the template you created back in this blog post: Next, make sure it’s all connected into Active Directory and everything is setup the way it needs to be. Then move onto launching the Microsoft SQL 2008 Installation:
1. Click on Run Setup.EXE
2. Click next
3. Since this is a brand new install, choose “New Installation or add features to an existing installation” across the top of the page.
4. it’s going to make sure everything is squared away and it should come back with PASS and no fails. Click Ok
5. Next it asks you to enter in the product key – click next
6. accept the licenses (or not 🙂 and click next
7. it’s going to install the setup files needed for the rest of the installation – click next
8 – you will see the process take off – shouldn’t take very long.
9. Support files looks good – notice the firewall warning – it comes back to haunt me later !!
10. I chose to do the whole thing – I didn’t want to take a chance of needing something down the road.
11. This shows you everything that will be installed – click next
12. Should go in easy peasy – with no errors.
13. Specify any names you want – I just took the defaults and clicked next
14. Review the disk space requirements – my guess is I’ll regret not making this SQL Server bigger then I did – probably a future blog post 🙂
15. Click on Use the “Use the same account for all SQL server Services”
16. I just chose my normal domain admin account – this is my home lab, so security isn’t really something I’m worried to much about – probably another thing I’ll regret down the road 🙂 – onwards and upwards – click next to get all this squared away and on to the next step !!
17. Specify the database engine authentication – In this screen shot I selected Windows Authentication – but I would recommend going to Mixed Mode – trust me in View 5 you will need this.
18. Click on Add current user
19. You should then see your user name show up
20. Just take the default on this and click next
21. Choose whatever makes you sleep better at night !!
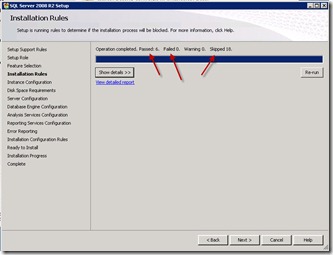
22. Setup runs the rules to make sure everything is okay – and then click next.
23. Double check everything – and then click next and go grab a coffee.
24. If everything goes well, you should see the bottom screen shot. Congrats, you just installed Microsoft SQL 2008 R2
See, told you next, next next blah blah – easy peasy…for now.


I’m looking to upgrade from View 4.0.1 to 5.0. We are currently using SQL 2K8 running on Server 08 SP2.
Is SQL 2k8 R2 version required for View 5.0? If so, what’s the OS requirement? Is it necessary to upgrade the server to R2 as well?
I ask, because I remember compatibility being an issue during deployment, and VMware support isn’t helping.
So – according to the installation guide for View 5 – http://pubs.vmware.com/view-50/topic/com.vmware.ICbase/PDF/view-50-installation.pdf – page 11 – it shows Microsoft SQL Server 2008 SP1 and later, Standard and Enterprise
(32- and 64-bit) as supported SQL versions for View Connection Server and if you look on page 10 it looks like it lists Win2k8 R2 as the only version – Now – if you run SQL on a stand-alone Windows Server then it would be whatever SQL requires as a minimum OS version for them – my bet is it’s R2 as well.
hope this helps !! if not, respond back and we’ll keep digging !!
Just wanted to drop a note and say thanks for the very nice tutorial – I finally setup my home lab (vs a lab at work where I leverage existing infrastructure) and thanks to you, I’ve just setup my first Microsoft SQL server.
Of course, having been an Oracle DBA for 15+ years, I feel pretty dirty now, but still – thank you!
Where SQL Server 2008 R2 should be installed. vCenter Server or vCenter Connection Server.